
A papercraft app should do three things well: help you pick a model you will actually finish, get the template onto paper at the right size, and keep track of what you are building. That is what we made Unfold: Papercraft Studio for. It is a hand-picked library of printable papercraft templates for iPhone and iPad: find a model, print it, then cut, fold and glue it into something real.
This guide explains how Unfold works, and then goes further: what paper and tools to buy, how to read a template’s numbers before you commit an afternoon to it, how to print so the pieces line up, and how to build a model from the first cut to the last seam. The examples come from the real Unfold template library, with each model’s real piece count, page count and build time.
- What Unfold is, and what it isn’t
- What you need before your first build
- Choosing a papercraft template: the five numbers
- Printing from the app so the pieces line up
- How to make papercraft: your first model, step by step
- Keeping track: favorites, collections and build status
- Three ways to start
- Common papercraft mistakes
- Membership, account and privacy, plainly
- Papercraft with children
- FAQ
What Unfold is, and what it isn’t
Unfold is a catalog of papercraft models with printing built in. You browse photos of finished models, open one to see what it takes to build, and send its template straight to your printer from your iPhone or iPad. Everything after that happens on your table, with paper, a blade or scissors, and glue.
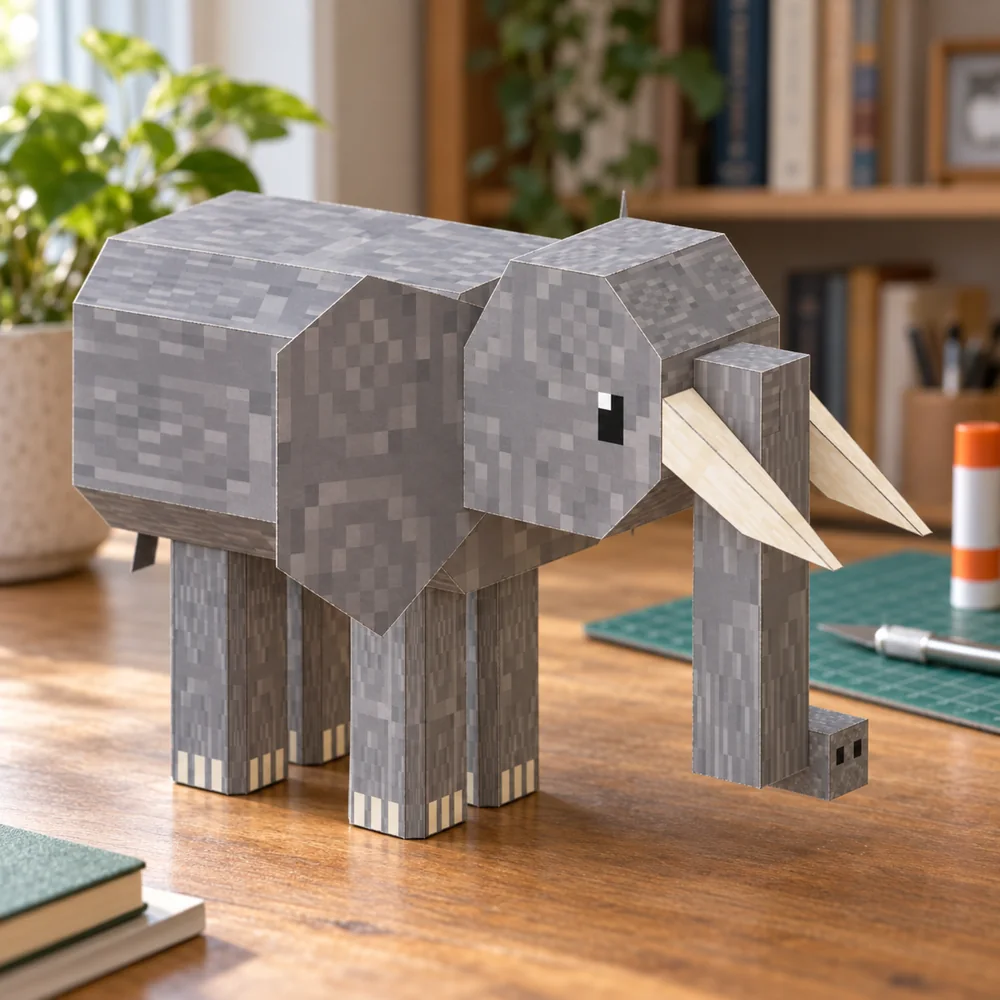
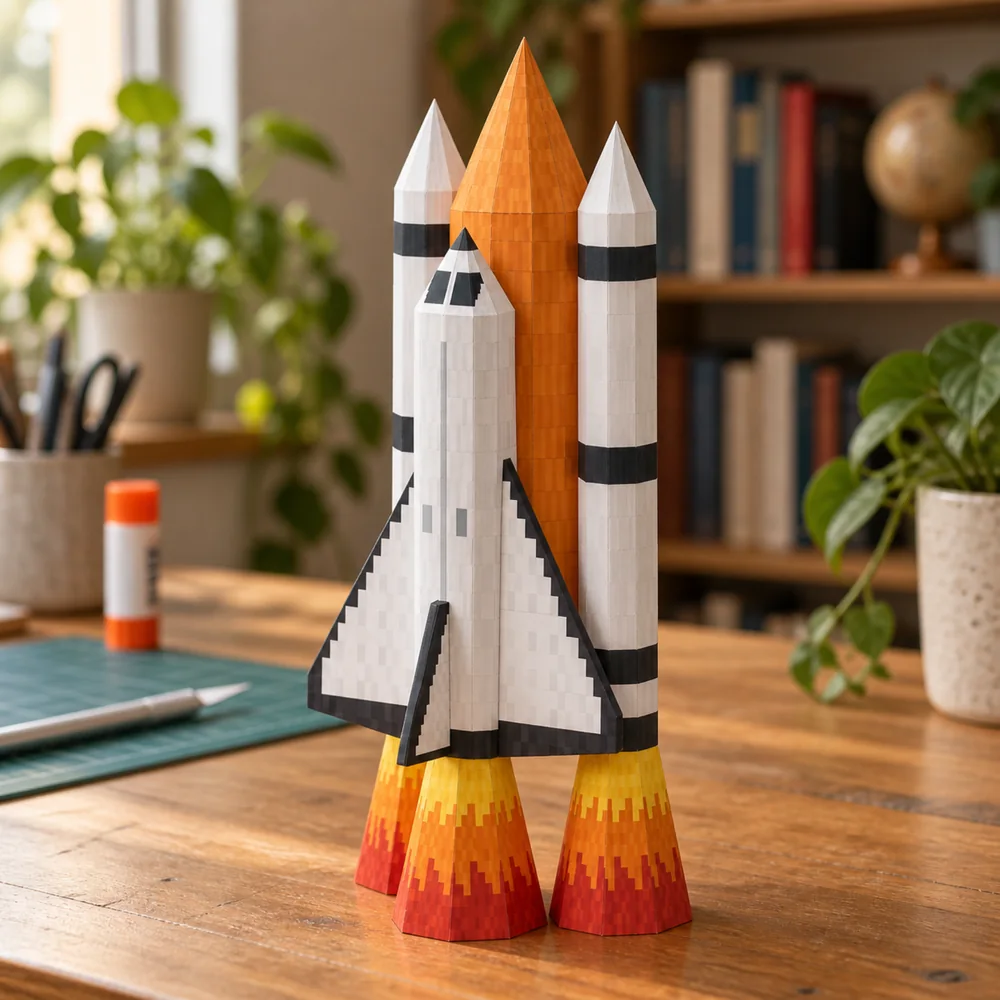
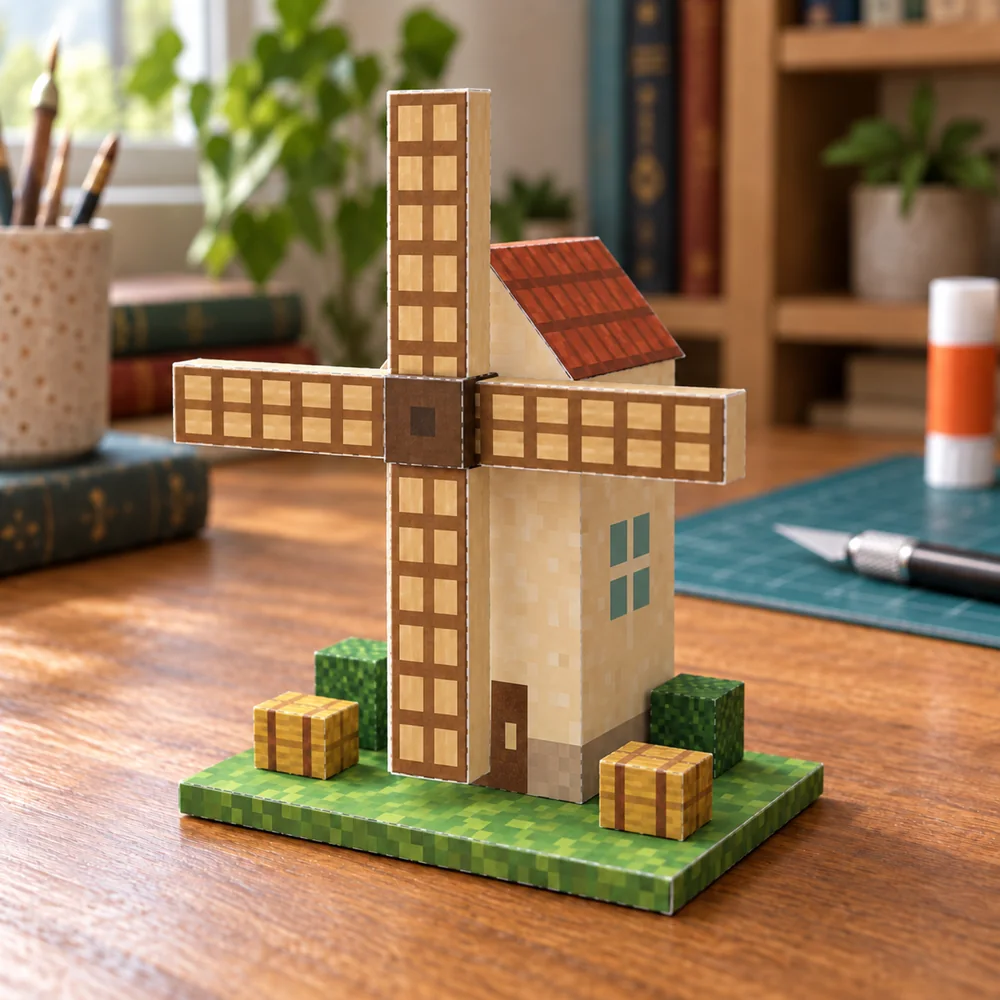
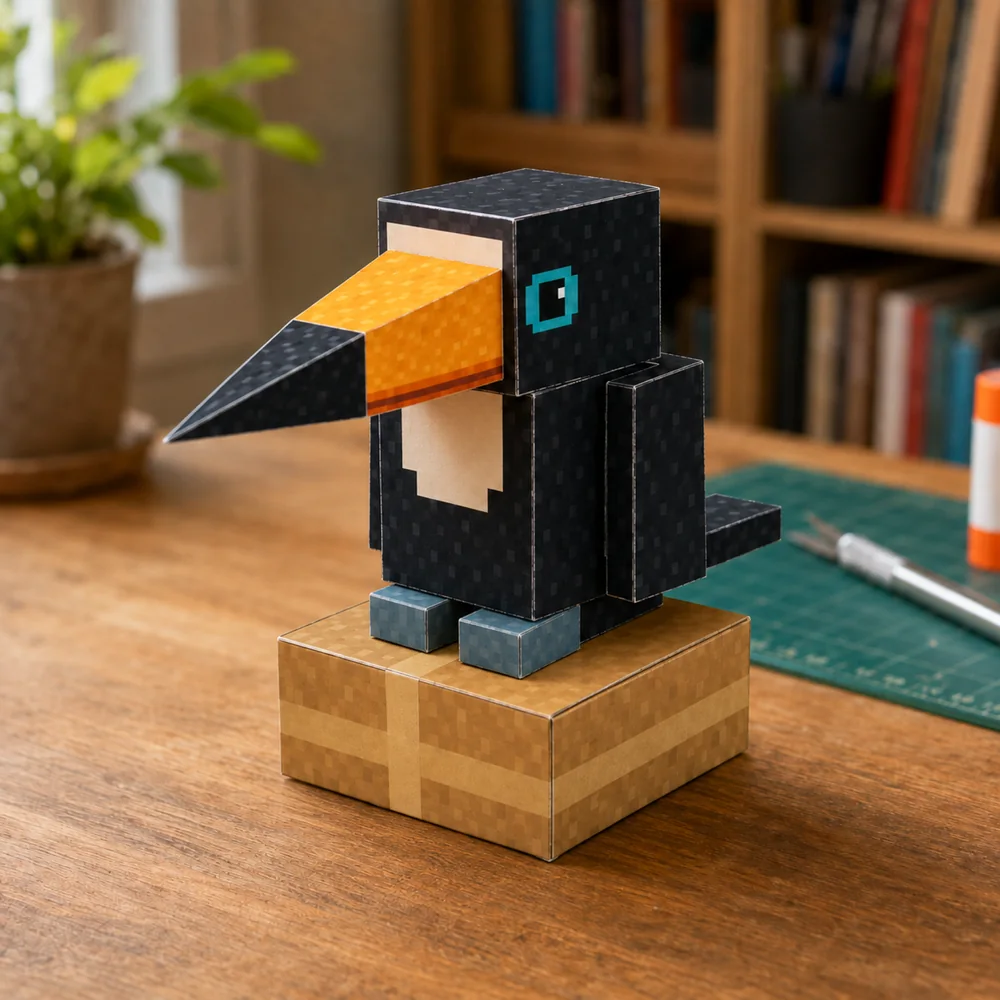
The models share a look. They are built in a pixel style: broad, flat facets printed with crisp square-pixel textures, the same square-pixel grammar as our own A² logo. That style is not only decoration. Big flat facets mean fewer tiny pieces and fewer tight curves, which is exactly what makes a paper model pleasant to cut and fold by hand, and the printed texture does the work that would otherwise need dozens of small parts.
A few things Unfold deliberately does not do, so you know what to expect:
- It does not hand you PDF files. Templates print from inside the app through Apple’s printing system. The app retrieves the template, checks it and sends it to the printer you choose; it does not keep a copy of the document or offer it for download.
- It does not include paper, a printer or tools. You need a compatible AirPrint printer, a network connection to print, and your own craft supplies.
- It is not a design tool. You don’t unfold your own 3D models in Unfold; you choose from templates that have already been designed, tested for assembly and described.
- It does not show ads or track you. More on that in the privacy section.
The voice of the app sums up why it exists: Less scrolling. More folding. Your phone is the way in, not the point. The point is the hour or the weekend you spend with your hands busy, and the model that sits on your desk afterwards.
What you need before your first build
Our support page puts it simply: paper or light cardstock, scissors, and paper glue are a good starting point, and you should follow the paper and tool recommendations on the template you choose. Here is how to choose each one well.
Paper
Ordinary copy paper will work for a first try, and it is the cheapest way to learn a template. But it is floppy: large flat faces bow inward and corners crush easily. Light cardstock holds its shape and gives you sharp, clean folds, which is why most papercrafters use it for the final build.
- Match the sheet size to the template. Every Unfold template lists its paper size: A4, US Letter or A3. Most of the catalog prints on Letter, but some models need larger A3 paper, such as the Ladybug, the Sunflower and the Lion. Check before you buy paper or start printing.
- Check what your printer can feed. Heavier cardstock may need the manual or rear feed tray, and some home printers simply refuse thick sheets. Your printer’s manual lists the paper weights it supports.
- Prefer matte over glossy. Matte paper takes glue well and doesn’t show fingerprints or crack along folds the way some coated papers do.
- Buy a little extra. A spare sheet means one miscut piece costs you a reprint of one page, not a trip to the shop.
Cutting tools
Small, sharp scissors are enough for beginner models with simple outlines. For straight edges and inside corners, a craft knife with a fresh blade, a metal ruler and a self-healing cutting mat give you much cleaner results. If you use a craft knife, use a mat: our support page recommends it, and it protects both the table and the blade.
- Change blades early. A dull blade tears paper fibers instead of slicing them, which leaves fuzzy edges and makes you press harder, which is where slips happen.
- Cut along a metal ruler for long straight lines, with your fingers on the far side of the ruler from the blade.
- Let scissors do curves and the knife do corners. Turning the paper, not the scissors, keeps curves smooth.
Scoring and folding tools
Scoring means pressing a crease line into the paper before you fold it, so the fold lands exactly where the template says and stays crisp. On cardstock it is the difference between a model with sharp edges and one with soft, wandering ones. You don’t need a special tool to start: a ballpoint pen that has run out of ink, the back of a butter knife or the blunt side of a craft knife blade, run along a ruler, all work. A bone folder is a nice upgrade for flattening folds afterwards.
Glue
Use a paper glue that grabs quickly and dries clear. A thin white craft glue, applied sparingly with a toothpick or a fine nozzle, is the usual choice for gluing tabs, because it gives you a few seconds to adjust a seam before it sets. Glue sticks are handy for flat laminating but often too weak for small tabs under tension. Whatever you use, less is more: a thin line holds better than a puddle, and excess glue squeezes out and shows on the printed surface.
A printer
Printing in Unfold requires a compatible AirPrint printer and a network connection. AirPrint is Apple’s wireless printing system, built into iPhone and iPad, and most current home inkjet and laser printers support it. If your printer shows up when you print a photo or a web page from your iPhone, it will show up in Unfold too.
Small extras that make a big difference
- Tweezers for pressing tabs inside closed shapes where fingers don’t fit.
- Toothpicks for applying glue precisely and for pushing a stubborn tab into place.
- A small tray or envelope for cut pieces, so labeled parts don’t get lost or creased while you work.
- Good light, ideally from the side opposite your cutting hand, so your hand doesn’t shadow the line.
Choosing a papercraft template: the five numbers
The fastest way to abandon papercraft is to start with the wrong model. Every Unfold template shows five facts before you print anything: difficulty, pieces, printed pages, build time and paper size. In the app you can also filter the catalog by category and difficulty and search by name. Learning to read the five numbers together is the most useful skill this guide can give you.
Difficulty
Templates are rated Beginner, Intermediate or Advanced. Beginner models have few pieces and forgiving shapes. Intermediate models ask for more careful scoring and gluing in sequence. Advanced models have many pieces, small parts and long assembly, and they reward patience and precise alignment.
Pieces
The number of separate parts you will cut out and join. More pieces usually means more seams to align, and more places for small errors to add up.
Printed pages
How many sheets the template prints on. This is your paper budget, and it is also a good proxy for how large the finished model will be.
Build time
An estimate of hands-on time from cutting to the last seam. Treat it as a planning number rather than a target: your first models will take longer, and drying time between stages isn’t always included in how long a session feels.
Paper size
A4, Letter or A3. Print on exactly what the template asks for. A template designed for A3 printed on Letter will not simply be smaller; its pages may be cropped or rescaled so that pieces no longer match.
Real templates, side by side
Here are twelve original and animal models from the Unfold library, ordered by build time. All figures are the ones each template lists.
| Model | Difficulty | Pieces | Pages | Build time | Paper |
|---|---|---|---|---|---|
| Ladybug | Beginner | 3 | 1 | 10 min | A3 |
| Halloween Ghost | Beginner | 2 | 1 | 20 min | Letter |
| Sunflower | Beginner | 5 | 1 | 30 min | A3 |
| Halloween Jack-o-lantern | Beginner | 10 | 1 | 1 h 23 min | Letter |
| Toucan on a Box | Intermediate | 10 | 1 | 1 h 45 min | Letter |
| Farm Windmill | Intermediate | 12 | 1 | 2 h | Letter |
| Hot Air Balloon | Intermediate | 14 | 4 | 2 h 40 min | Letter |
| Space Shuttle | Intermediate | 14 | 5 | 2 h 50 min | Letter |
| Fat orange cat on a scale | Intermediate | 23 | 7 | 3 h 30 min | Letter |
| Elephant | Intermediate | 13 | 17 | 5 h | Letter |
| Capybara | Advanced | 38 | 13 | 7 h 30 min | Letter |
| The White House | Advanced | 72 | 33 | 17 h 30 min | Letter |
What the numbers tell you together
Read the table across, not just down, and a few patterns appear that are worth knowing before you choose:
- Piece count does not predict build time on its own. The Elephant has only 13 pieces, fewer than the Fat orange cat’s 23, yet it takes longer: 5 hours against 3 h 30 min. The reason is in the pages column: the elephant’s 13 pieces spread over 17 printed pages. Its parts are large, so every cut, score and seam is longer. Fewer pieces can still mean a big, slow, satisfying build.
- Pages tell you the finished size. One-page models like the Farm Windmill or Toucan on a Box become desk-sized pieces. Models that run to a dozen pages or more, like the Capybara at 13 or The White House at 33, are display pieces that need a shelf of their own.
- Difficulty and time are related but not the same. The Farm Windmill and the Elephant are both Intermediate, but one is a two-hour evening and the other a weekend. Use difficulty to judge whether you have the skills, and build time to judge whether you have the time.
- Paper size can surprise you on simple models. Three of the quickest beginner models here, the Ladybug, the Sunflower and the Lion, print on A3. If you only have Letter or A4 paper, the Halloween Ghost (2 pieces, 20 minutes, Letter) is a better first build.
Printing from the app so the pieces line up
Most papercraft frustration that looks like a building problem is really a printing problem. If one page prints at 97% and the next at 100%, no amount of careful gluing will make their seams meet. Our support page’s advice is short and worth following exactly.
- Load the paper size the template lists, and use the same paper for every page of the model.
- Open the template in Unfold and tap Print Template. The app checks the document and opens Apple’s printer picker.
- Print at 100% or “actual size”, and turn off “fit to page”, unless the template says otherwise. Scaling is the most common reason pieces don’t line up.
- Print a test page first on plain paper before you feed in your cardstock. Check that edges aren’t cropped and that the printout looks the same size as the template preview.
- Then print the full template on your final paper, and let ink dry before you score. Scoring over wet inkjet ink can smear it.
Results vary with your printer, its settings, the paper and the materials, which is why the test page matters. If your printer has a “high quality” or “best” mode, it is usually worth using for the final print: the pixel textures on Unfold models are made of crisp color blocks, and they look their best when the printer doesn’t blur them.
How to make papercraft: your first model, step by step
Every model is different, and the template’s own fold guide and piece labels always come first. But the order of work below applies to nearly every papercraft model, and following it avoids most beginner mistakes.
1. Study the template before you cut
Look at the finished-model photo in the app, then at the printed sheets. Find the piece labels and the fold guide, and work out which parts make which section of the model. Two minutes here saves twenty later. Notice which lines are cut lines and which are fold lines, and which folds go which way: a fold that bends away from you (a mountain fold) and one that bends toward you (a valley fold) look very different on the finished model.
2. Score every fold line while the sheet is still flat
Scoring is far easier and more accurate on a whole, flat sheet than on a small cut-out piece that slides around under the ruler. Run your scoring tool along a ruler on each fold line with firm, even pressure: enough to make a visible groove, not enough to cut through. On cardstock, this step is not optional.
3. Cut out the pieces
Cut on the line or just inside it, so no white border shows on the finished model. Cut straight edges with a knife and ruler, curves with scissors. Leave the glue tabs attached; they look like extra flaps, but they are what holds the model together. As each piece comes free, check its label and put it in your tray.
4. Pre-fold every piece
Before any glue comes out, fold each piece along all its scored lines, in the right direction, then open it back up. This “dry fold” shows you the piece’s 3D shape and makes the final folds snap into place when you glue. For the sharpest edges, pinch each fold between finger and thumb or run a bone folder along it.
5. Glue one tab at a time, in label order
Match the piece labels before gluing, as the template’s guide shows. Put a thin line of glue on a single tab, join it to its matching edge, and hold it for a few seconds until it grips. Then move to the next tab. Gluing several tabs at once feels faster, but the first one shifts while you fight the third.
6. Close shapes last, from the inside out
The hardest seam on any closed shape is the last one, because you can no longer reach inside to press it. Plan for it: glue the seams you can reach from both sides first, and leave the final closing edge for the end. Press it from the outside with a fingertip, the flat of a toothpick or tweezers through the remaining gap.
7. Join the sections and let it set
Most models are built as sub-assemblies, such as a body, a head and a base, that are joined at the end. Let each section dry before you join it to the next so the earlier seams don’t pop open under handling. When the model is complete, leave it alone for a while before you move it to its shelf.
If a fold still has you puzzled, you are not on your own: email app-support@asquared.agency with the model name, the piece number and a photo of the tricky bit, as described on the Unfold support page.
Keeping track: favorites, collections and build status
Papercraft has a habit of turning into a list: the model you’ll build next weekend, the one you’re halfway through, the ones you’d like to make for a birthday. Unfold has a library for exactly that.
- Save favorites while you browse, so a model you like is one tap away later.
- Organize them into collections of your own, such as autumn decorations, desk animals, or gifts.
- Track each project’s status as Want to Build, In Progress or Completed.
Where this information lives is worth knowing. If you use the app without an account, your saved projects, collections and build progress stay on your device. If you sign in, the templates you save are stored with your account so they can appear on your other devices, while collections and build progress stay on the device where you made them. If you start as a guest and sign in later, the work saved on that device moves into your account.
A practical way to use the statuses: keep only one or two models In Progress at a time. Half-built models collect dust and lose pieces; a short Want to Build list keeps the next project exciting instead of overwhelming.
Three ways to start
If you’re not sure which model to print first, pick the path that matches your time and paper.
The first evening: under an hour
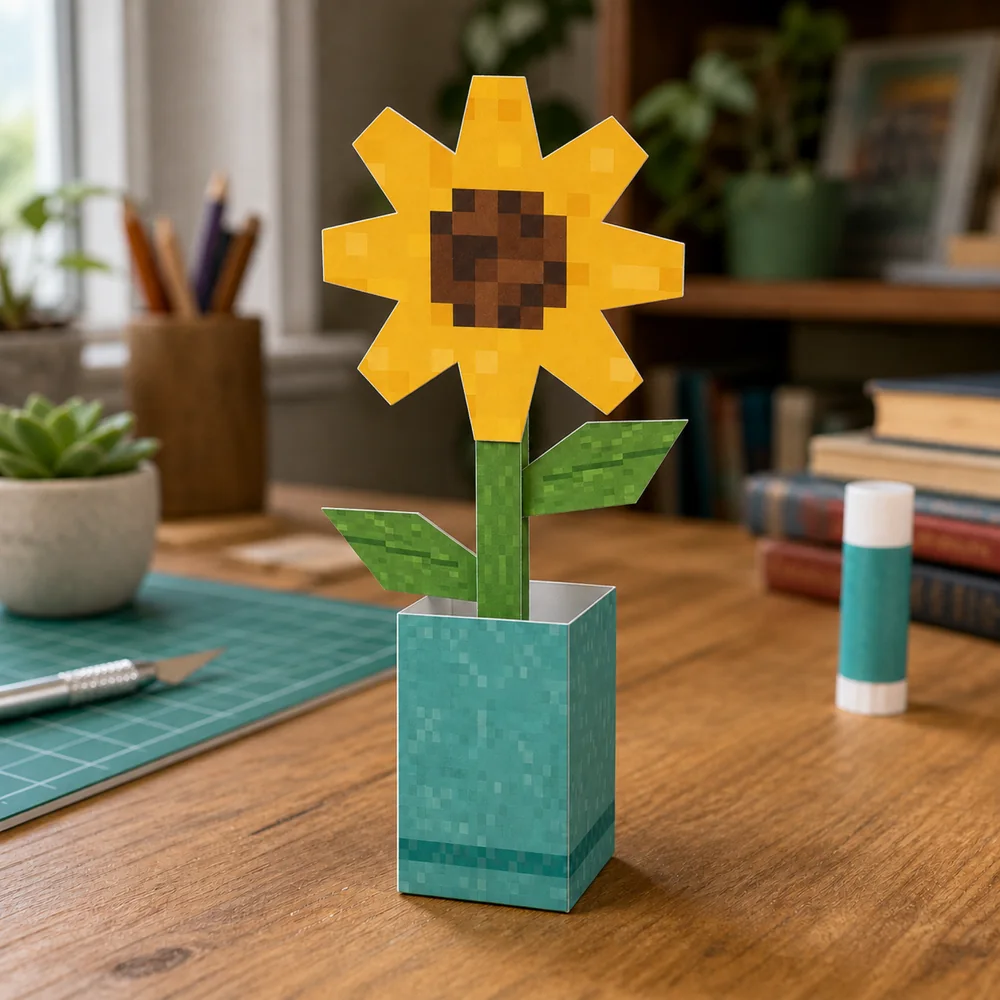
Start with a Beginner model with a handful of pieces. The Halloween Ghost is two connected nets on a single Letter page, about 20 minutes. If you have A3 paper, the Ladybug (3 pieces, about 10 minutes) and the Sunflower in its turquoise vase (5 pieces, about 30 minutes) are just as quick. The goal of the first build is not the model; it is learning how your paper scores, how your glue grips and how your printer handles cardstock.
The weekend afternoon: two to three hours
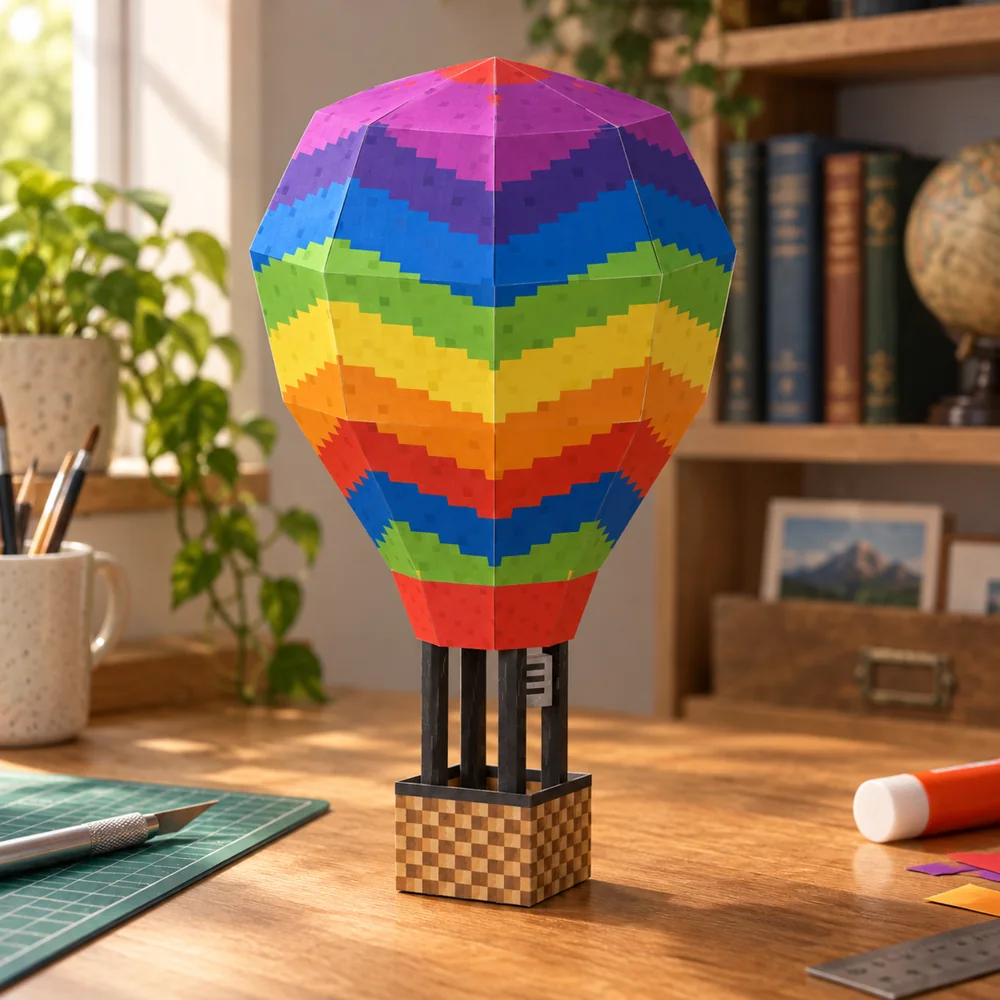
Once you’ve finished a beginner model, step up to a one-page Intermediate build. The Toucan on a Box (10 pieces, about 1 h 45 min) and the Farm Windmill (12 pieces, about 2 hours) both fit on one Letter page. When you’re ready for more pages, the Hot Air Balloon (14 pieces, 4 pages) and the Space Shuttle (14 pieces, 5 pages) introduce sub-assemblies that are joined at the end.
The long project: a model that takes over the table
Advanced models are where papercraft becomes a slow, absorbing hobby. The Capybara is 38 pieces over 13 pages, about 7 h 30 min. The Great Wall of China, winding across faceted hills with three watchtowers, is 61 pieces and about 9 h 30 min. And The White House, with both its North and South Porticos, is 72 pieces over 33 pages and about 17 h 30 min. Spread a project like this over several sessions, mark it In Progress, and store finished sub-assemblies somewhere flat and safe between sessions.
Common papercraft mistakes
Almost everyone makes these on their first few models. Knowing them in advance is the shortcut.
- Printing with “fit to page” on. It quietly shrinks every page by a slightly different amount, and seams stop meeting. Print at 100% or actual size.
- Mixing paper sizes or types within one model. Every page should use the same paper size and the same print scale.
- Skipping the test page and discovering a cropped edge on your last sheet of cardstock.
- Not scoring cardstock. Unscored folds crack, wander off the line and spring back open.
- Cutting off the glue tabs because they look like waste. They aren’t.
- Using too much glue. It wrinkles paper, squeezes out onto the printed faces and takes longer to set. A thin line is stronger.
- Gluing out of order. Follow the piece labels; building ahead of the sequence often leaves a seam you can no longer reach.
- Starting with the most impressive model. A 70-piece landmark as a first build is how papercraft ends up in a drawer. Build two or three short models first.
- Rushing the last seam. Closing a shape is the fiddliest step. Slow down, use tweezers, and hold it until it grips.
Membership, account and privacy, plainly
Unfold is a membership app. Here is how it works, in the same terms as our terms and conditions and privacy policy.
Membership
- Monthly or annual. Unfold offers monthly and annual auto-renewing memberships, and both include the full template catalog and in-app printing.
- The price is shown before you buy, in the app, in your local currency, with its billing period.
- Apple handles payment. You’re charged through your Apple Account, and we never receive your card details.
- Cancel any time in your Apple Account subscription settings. You keep access until the end of the period you’ve paid for. Deleting the app or your Unfold account doesn’t cancel the membership, so cancel in your Apple Account settings.
- New device? Use Restore Purchases to regain access on another device signed in to the same Apple Account.
What you may do with templates
While your membership is active, you can view templates in the app and print them with the app’s printing feature to build models for your own personal, non-commercial use. You keep the pages you’ve printed and the models you’ve built. Templates and printed sheets are not for copying, scanning, sharing or selling, and neither are models built from them. You are welcome to share photos of your own finished builds for non-commercial purposes, and we’d love to see them.
Account and privacy
- An account is optional. You can browse, subscribe, save projects and print without creating one. If you do create one, it needs only an email address, and you can sign in with a one-time code sent to your email or with Sign in with Apple.
- No ads, no tracking, no data sales. Unfold doesn’t show ads, track you across other companies’ apps or websites, or sell personal information.
- No access to your personal stuff. The app doesn’t ask for access to your location, contacts, camera or photos.
- Delete your account in the app from Account → Delete account.
Papercraft with children
Unfold is made for makers of all ages, and papercraft is a lovely thing to do together: a child can choose the model and press the tabs while an adult handles the blade. A few rules keep it relaxed and safe:
- Choose tools for the maker’s age and ability. Children’s safety scissors for younger makers; craft knives stay with adults. Follow the tool manufacturer’s directions and protect your work surface.
- Supervise where needed. Papercraft can involve sharp tools, glue and small parts.
- Remember that paper models are decorations, not toys. Keep small pieces and sharp tools away from young children and pets.
- Pick short Beginner models. A 20-minute ghost or a 30-minute sunflower ends while everyone is still having fun.
- Use Ask to Buy. Purchases go through an Apple Account, so families can use Apple’s Ask to Buy to approve them, and a parent or guardian should create or approve an account for a child under 13.
FAQ
What is the best paper for papercraft?
Light, matte cardstock that your printer can feed is the usual choice: it holds its shape and folds crisply. Plain paper works for practice and test prints. Always use the paper size the template lists, which in Unfold is A4, Letter or A3.
Do I need a special printer?
You need a compatible AirPrint printer and a network connection. Unfold prints through Apple’s built-in printing system, so a printer that already prints from your iPhone or iPad will work. Check that it can feed the paper weight you want to use.
Can I download the templates as PDFs?
No. Templates print directly from the app; the app doesn’t keep a copy of the document or offer it for download. You can keep every page you print and every model you build.
Why don’t my printed pieces line up?
Almost always scaling. Check that every page uses the same paper size and print scale, choose 100% or “actual size”, and turn off “fit to page”, unless the template says otherwise. Print a test page before using your cardstock.
How long does a papercraft model take?
Each Unfold template lists an estimated build time. In the library, beginner models range from about 10 minutes for the Ladybug to about 1 h 23 min for the Halloween Jack-o-lantern, while the largest advanced models, such as The White House, run to about 17 h 30 min across many sessions.
Does Unfold work on iPad?
Yes. Unfold is made for iPhone and iPad, and it prints from either.
Can I see the templates before I subscribe?
Yes. The Unfold papercraft library on our website shows every template with its photo, difficulty, pieces, printed pages, build time and paper size. Printing happens in the app.
How do I cancel my membership?
In your Apple Account subscription settings. You keep access until the end of the period you’ve paid for. Deleting the app or your Unfold account doesn’t cancel it. For billing or refund requests, Apple handles purchases under its own policies through Apple’s purchase support.
Make something this week
The best papercraft app is the one that gets a model onto your desk. Pick a short Beginner template, print a test page at actual size, score before you cut, and glue one tab at a time. By the third model you will be choosing by build time rather than by fear of the instructions.
- Get Unfold: Papercraft Studio on the App Store
- Browse the papercraft template library
- Get help from Unfold support
Unfold is made by asquared, an independent studio in Istanbul making apps for iPhone and iPad. A little paper. A little magic.